
So you want to stream? Well you are not alone, tonnes of people are getting in on the game and loving every moment on it. To stream you are going to need sort out some stuff, some hardware (computer, microphone and webcam as a basic), an internet connection (maybe better than the one you are on now) and some software (actually the easiest part).
In this article we will cover everything you need to know and do to get you up an streaming, in less than ten minutes if you have sorted out the basics. Let’s start with those basics.
You need an internet connection.
Obviously if you are reading this article you likely have this sorted, but it needs to be fast enough to broadcast your stream to the thousands of fan you are going to get. The good news is that you don’t need a bigger connection with the more fans you get, because what is actually happening is you are streaming up to the streaming server (twitch.tv, youtube.com) and that server is streaming down to all your fans. They handle the hard stuff of the more fans you get the more capacity they need to stream to your fans, not your problem. So your internet connection only has to be large enough to send up your content to the streaming server.
How fast is fast enough? Most streamers stream in high definition, which requires an upload speed of 5mbs. The important word here is UPLOAD, as opposed to download, because you will be sending UP your content to the streaming server.
You can check your upload speed for free at the following address: http://www.speedtest.net/ Just click the BEGIN NOW button.

You can see from my results my upload speed is 847.56mbs, which is way more than I need to stream. You could get away with less than 5mbs but I find you can run in to trouble on less than this.
The Computer
The next thing you need is a computer with a semi-decent video card, processor and a bunch of RAM. The minimum/recommended stats would be the following:
Processor : i5 or i7
RAM : 8GB or 16GB
Video Card : NVIDIA GeForce
Here would be my top three gaming laptops that would easy be able to stream while playing the game.
* Dell Inspiron i7559-763BLK
* ASUS K501UX
* ASUS ROG GL552VW-DH71
I often get asked why I recommend a Laptop for streaming rather than a desktop, the answer is a simple one, you often want TWO screens. One screen for the game, most likely the external screen and one screen showing the streaming software, so you can control the stream while still in game.
If you have a desktop that supports multiple screens then all cool, if it meets the above mentioned hardware requirements you are set.
The Monitor
While we are on the subject of monitors, what should you look for? Well when it comes to streaming your monitor makes little difference, it doesn’t impact the stream, but when you are gaming you want something with a low sync rate.
Below are my top three recommendations for gamming monitors:
* BenQ RL2755HM
* Acer G226HQL
* LG 25UM56P
The Camera
Obviously if you have gone down the Laptop route for your stream it already has a camera. The problem with laptop cameras are that they are not very manoeuvrable, it s not easy to get the right angle and height for good shots etc, so I recommend a webcam.
There is not too much requirements for a webcam, it needs to shoot in HD, and it needs to be good enough, quality wise, to stream for hours without overheating, I have had this happen to me a couple of times.
Go with the brand names, they know what they are doing, for me you can’t beat a decent Logitech, I have never had problems with them.
Here are my top three, I currently stream with the C920.
* Logitech HD Webcam C615
* Logitech HD Pro Webcam C920
* Logitech C930e
The Microphone
Some webcams come with a Mic on them, including the ones I have recommended above, if you are on a budget you can use these, but there is a problem with this strategy. If you use the built in Mic you need to make sure you are always sitting straight in front of the Mic when speaking, otherwise your voice will drop out.
If you want a decent Mic you want a USB Mic that can record in stereo and that is free standing, which is more flexible than trying to stream with a headset on.
Here are my top three Mic’s, I currently stream with the Yeti and have had no problems with it for over two years.
* Blue Microphones Yeti
* Audio-Technica AT2020USB
* Blue Microphones Spark
The Software
If you know what you need this is the easy part, if you have never streamed before then knowing what software you need is the problem. Fortunately I have the answer for you, Open Broadcaster Software and its FREE!
Open Broadcaster Software is open source software that allows you to stream or capture video. You would capture if you just want to upload a vide to youtube.com or one of the other video platforms. You would stream on twitch.tv or one of the other platforms. This software has you covered in both instances.
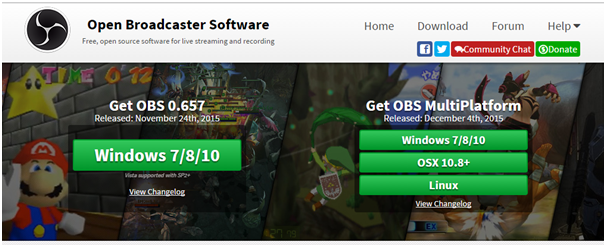
First lets download the software, go here: https://obsproject.com/
Click Windows 7/8/10 under the Get OBS Multiplatform, which will start the download.
`
Click on the downloaded file in your browser:
Install with the default settings. Once you click finish and have agreed to their license it will start the application.
You need to configure it for first use. Below I will show you how to set it up to stream to Twich, there is also a good vide I found on YouTube that will help with the install and configuration, which I have embedded below.
Basic Setting Configuration:
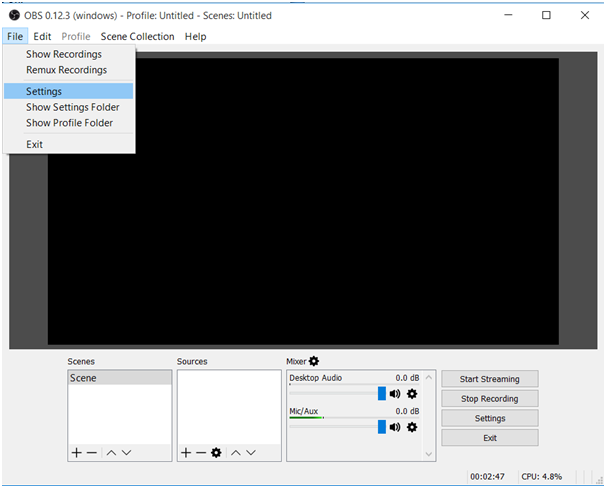
Go to File Settings
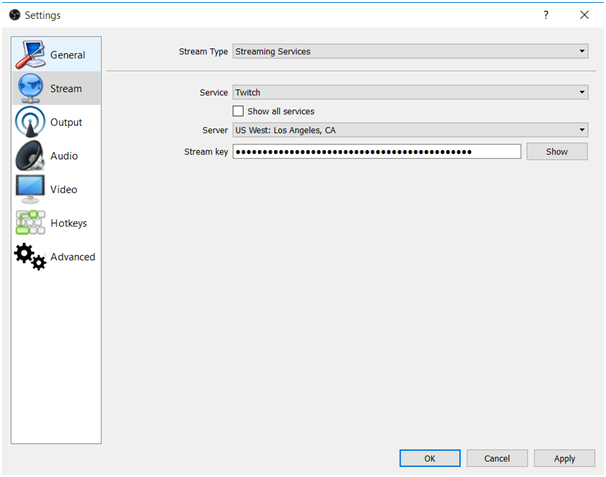
Choose Stream on the right hand menu and select Twitch, this should be the default.
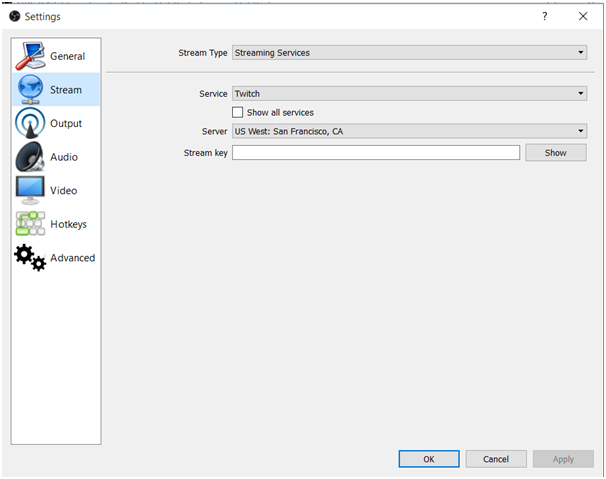
You want to pick a Server that is close to your physical location, I have chosen US West: San Francisco, CA, as there where I am currently based.
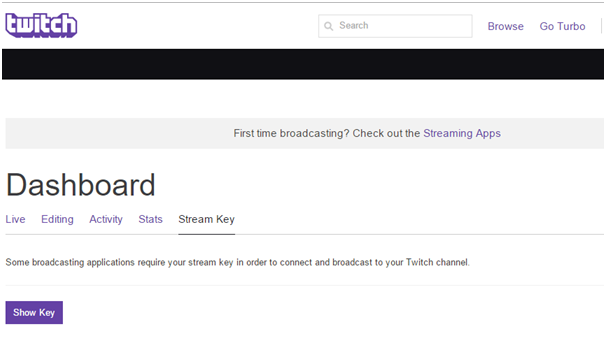
The important part is the Stream key, which you can get from your Twitch.tv account. Login to your Twitch Account, Click on your Name and select DASHBOARD and click on Stream Key.
IMPORTANT, don’t share or show anyone this stream key, it is your unique ID, that if someone else managed to copy they could start broadcasting as YOU, dick pics and all. so yeah, don’t do that.
Copy the key and paste it in to your settings. BTW, all the other streaming services work the same way just find the stream key and paste it in. Supported streaming services are twitch.tv, youtube, including youtube gaming, hitbox.tv, beam.pro, DailyMotion and LiveCoding.tv.
The next setting you want to look at is your Output settings. When you stream it will create a copy of your stream and stick it in the Recording Path, which allows you to then upload the stream to other VOD sites, like youtube.com.
These files can get big, so lots of hard-disk space would be good, don’t use your C: drive, cause if you fill that up that will crash your machine. I use an external 1.5TB eSATA disk to keep all my recordings on, you can get one here: WD 1.5TB Black My Passport
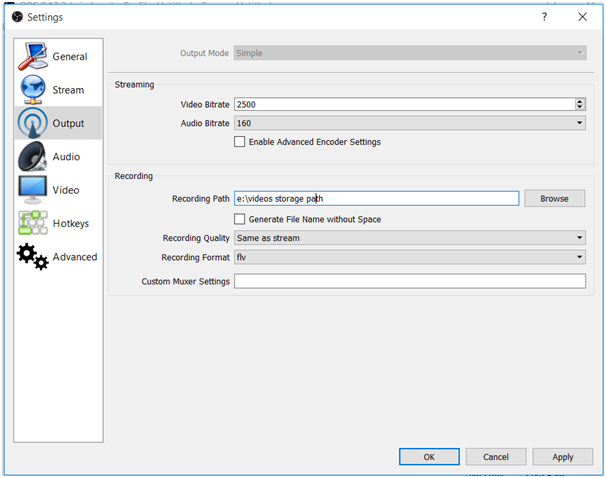
You might want to also adjust the recording format, I use flv, but I know MP4 is pretty popular and there are lots of tools out there to edit these formats.
The Audio settings you can change on the fly when recording or streaming so no need to adjust those settings here. The videos settings are important, you ned to change the frame rate to the same as your game, 60fps is normally spot on for things like League of Legends, Dota 2 or Counter Strike.
That’s it, hit Apply, and OK, and you are ready to stream! Congrats!
Below is a video from Youtube which is a great introduction to using the software and setting it up. If you have any questions throw them in below.